Professional planning tools with measurable outputs
Accessible for planners and creatives, with the technical depth
AV teams expect.
Multi-projector planning at GPU speed
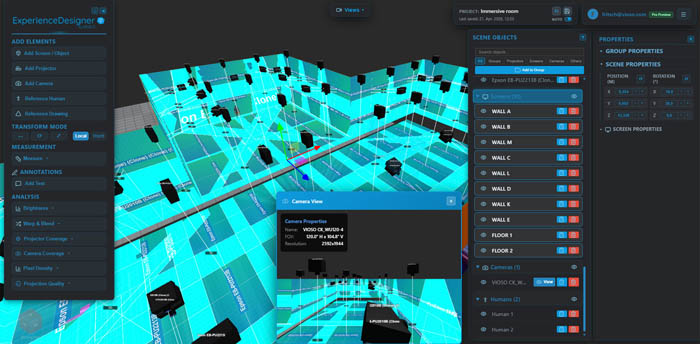
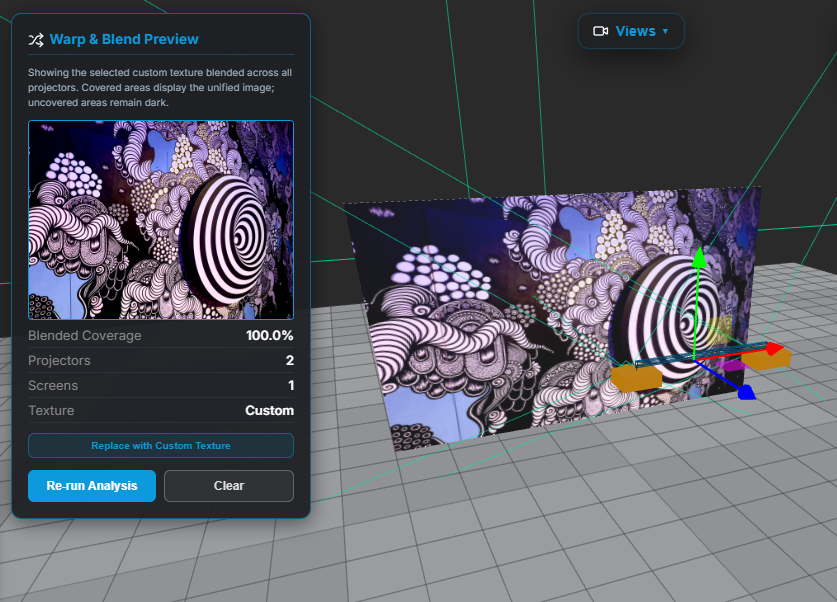
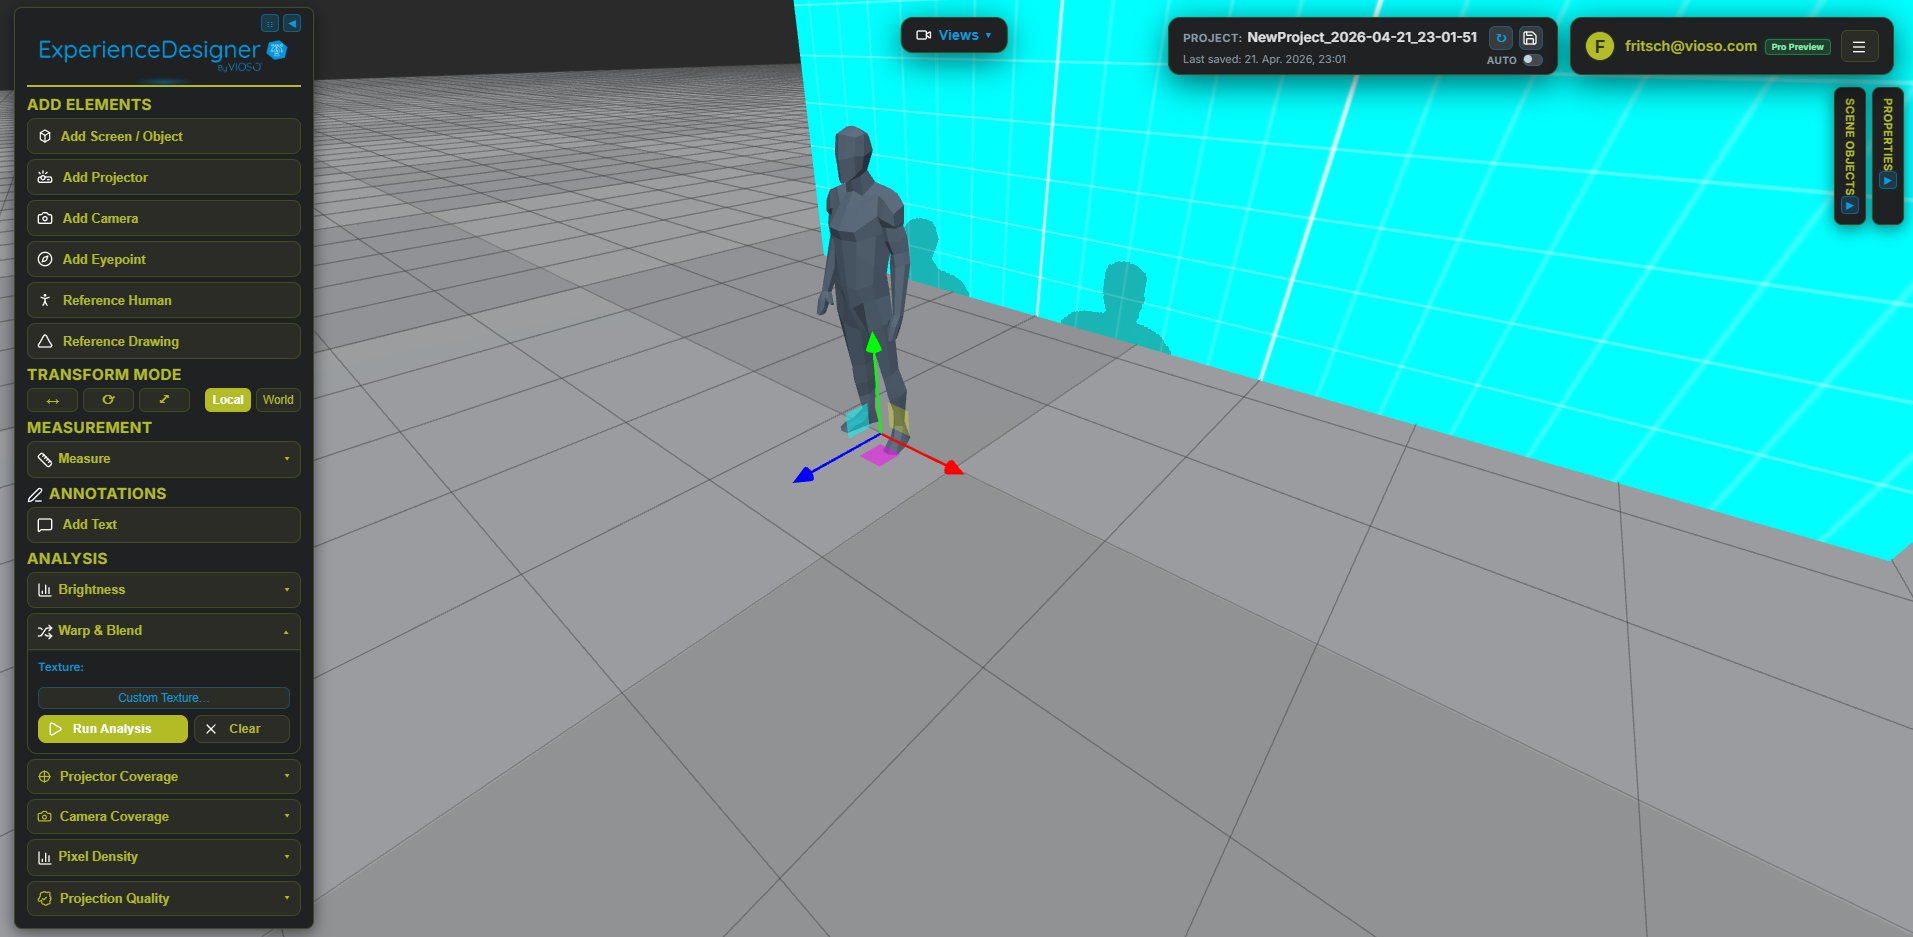
Run 50+ projectors simultaneously with per-pixel brightness and overlap analysis. The rendering engine uses texture arrays and shared depth maps — so performance stays smooth even on complex rigs.
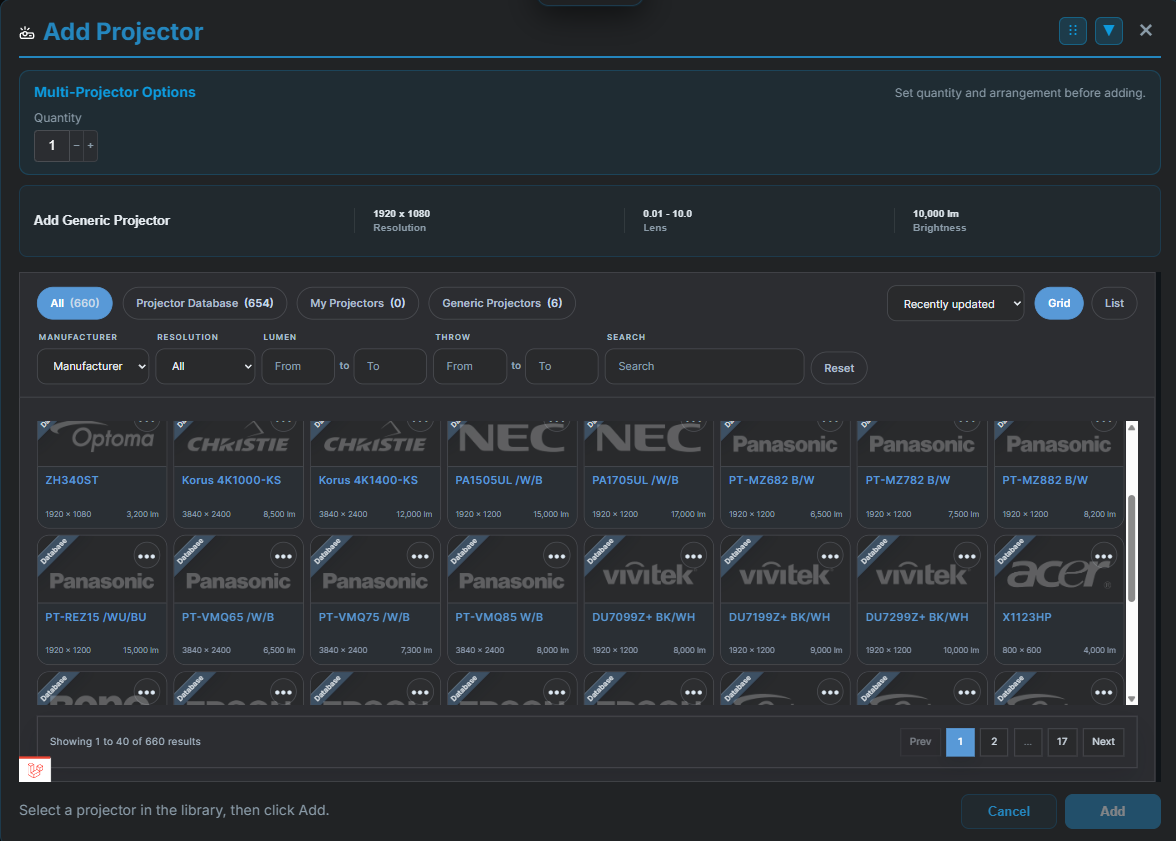
Pick from 660 real projector models (Panasonic, Christie, Barco, Norxe, Epson, and more) with manufacturer specs baked in.
Predictable, validated system design
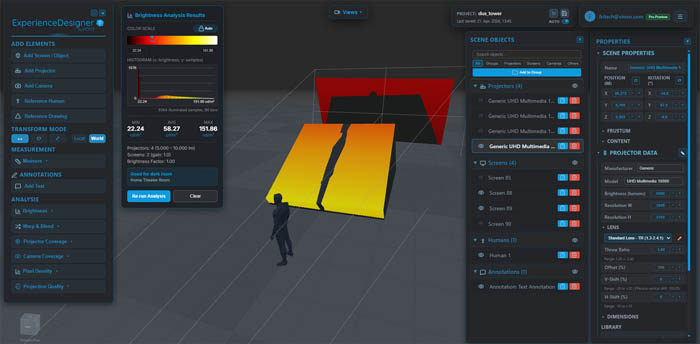
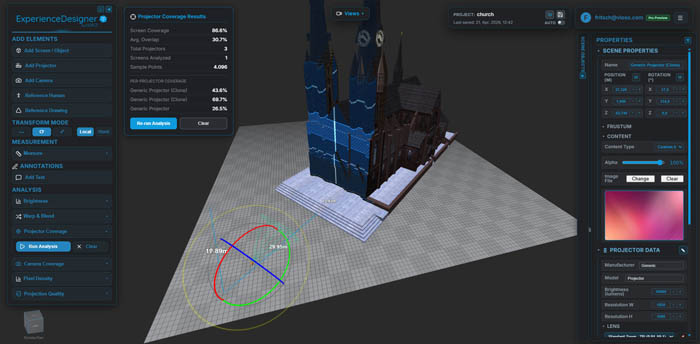
Illuminance in lux. Pixel density in px/m. Angular resolution. Uniformity ratios. All computed per-pixel, not estimated from center-screen values.
GPU-based occlusion detection shows exactly where objects or other projectors block light — before you discover it during setup.
Works across real-world surfaces and spaces
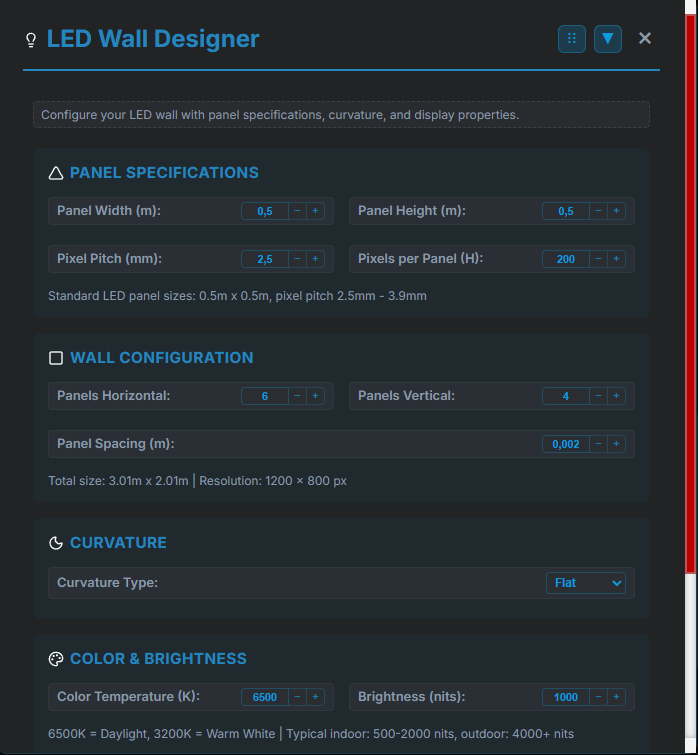
Flat, curved, cylindrical, dome, spherical. LED walls with pixel pitch, brightness in nits, and curvature settings. Import OBJ, FBX, or GLTF models as custom projection surfaces.
If you can project on it in the real world, you can plan it here.
Shareable outputs for teams and clients
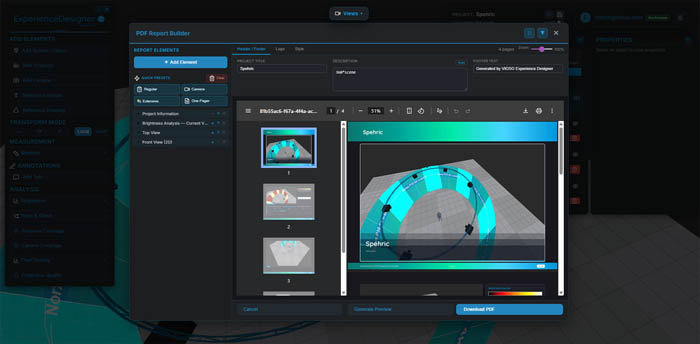
Generate polished PDF reports with projector specs, photometric data, and scene screenshots — ready to hand to a client or attach to a proposal. Export your full scene geometry as OBJ for use in rendering or CAD software.
Share an interactive 3D link so stakeholders can explore the projection layout themselves — no login, no install, no back-and-forth. Equipment lists export as CSV for procurement spreadsheets, and full project data saves as JSON for backup or handoff.
The rest of the toolbox
Projector library
600+ real projector models for reliable system planning.
LED planning
Plan LED surfaces with pixel pitch and brightness-aware setup controls.
Content previs
Preview creative content placement directly in the 3D environment.
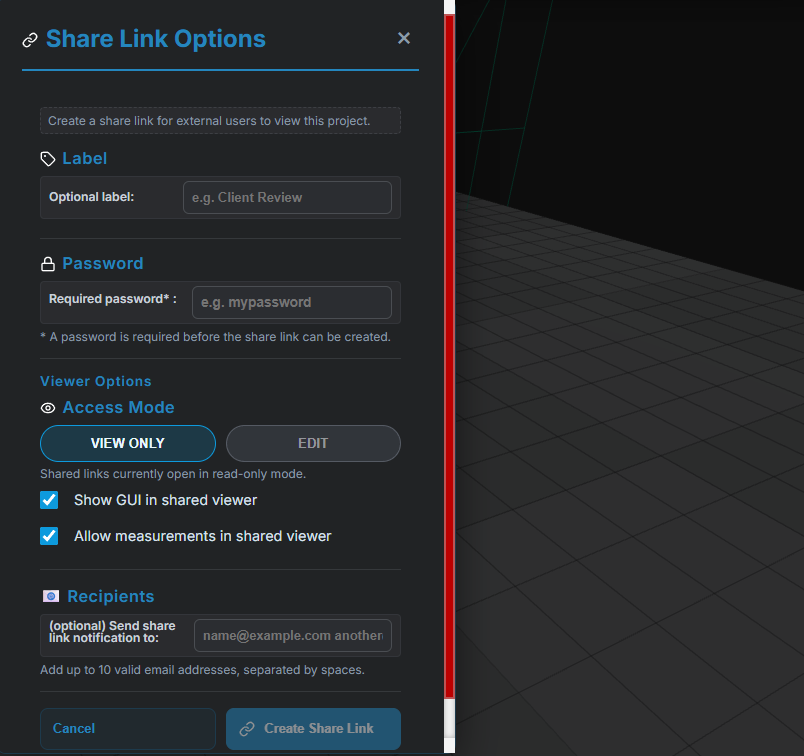
Link sharing
Share planning scenes with teams and clients using interactive links.
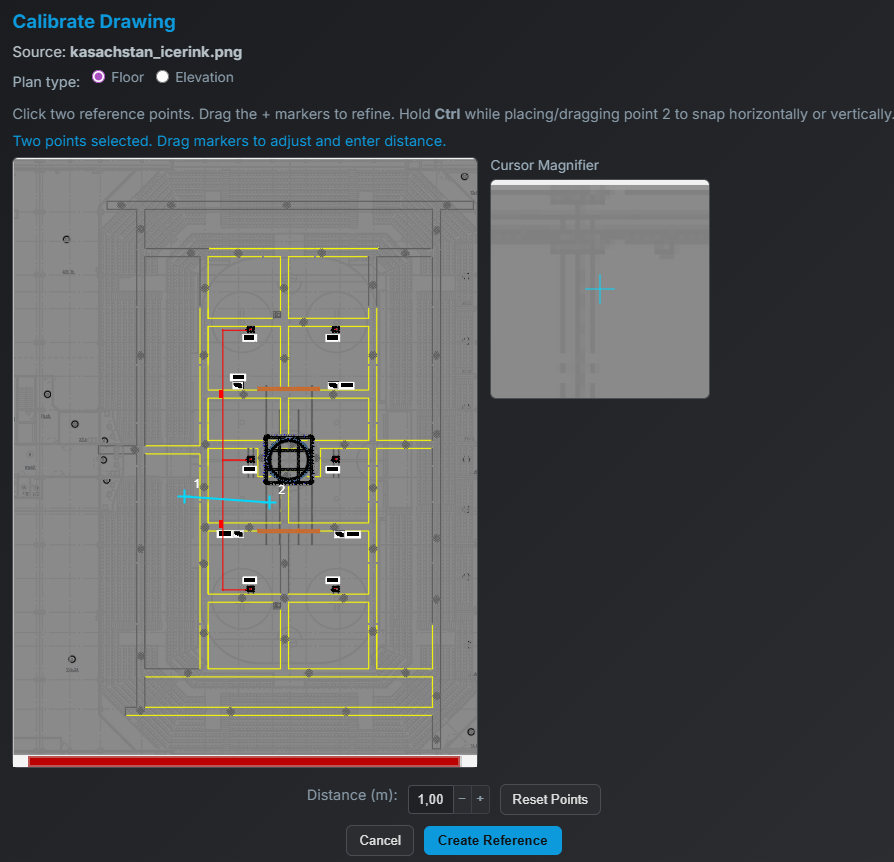
1:1 drawing import
Import scaled drawings as direct reference for accurate planning.
Custom 3D import (OBJ/FBX)
Bring custom geometry into your project for realistic surface planning.
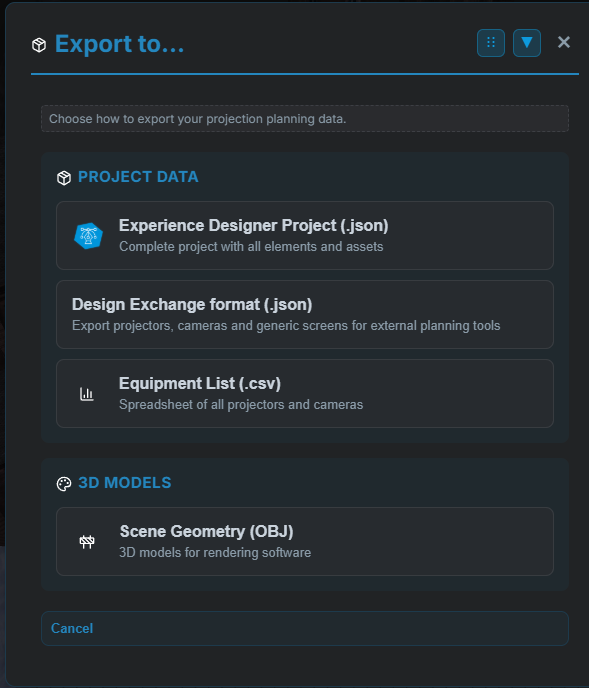
Export scene as mesh (.obj)
Export the planned scene mesh for downstream rendering and workflows.
Customization
Customize interface and project setup for team-specific workflows.
Experience Designer for Simulation and Defense – precision projection design for mission-critical environments
A cloud-based platform enabling simulation engineers, defense integrators, and AV specialists to design, simulate, and validate complex projection systems with high physical accuracy – before deployment.
Designed for high-precision simulation environments
Experience Designer supports use cases such as:
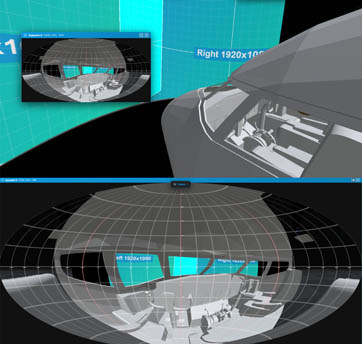
- Full-dome and cylindrical simulators
-
Cockpit and driver training systems
-
Immersive command and control environments
- Research and engineering simulation setups
The platform allows engineers to replicate real-world optical behavior and evaluate system performance under realistic conditions.
Advanced analysis for mission-critical systems
Beyond visual planning, Experience Designer provides detailed analytical tools required in simulation workflows:
-
Pixel-level resolution and coverage analysis
- Luminance distribution and photometric validation
- Shadowing and occlusion analysis
- View-dependent system evaluation
These capabilities support objective system verification, not just visual approximation.